Published:
How to Change a JPG into a DST Embroidery File Format?
Are you looking to convert a JPG photo to a DST embroidery file? If you answered yes, you've come to the correct place. Embroidery digitizing is the process of converting artwork, logos, and designs into stitch-ready files for embroidery machines. Understanding the process is important, whether you're working on a left chest logo, a hat design, or mass garment orders for B2B clients.
For large orders, particularly in the B2B market, consistent and high-quality embroidery is essential. Whether it's a company logo or a unique design for custom garments, this post will show you how to convert JPG images to DST files effectively. With the right stitch patterns and settings, your embroidery machine will be able to create amazing designs that fit your specifications. Follow along to discover how to transform your artwork into stunning embroidery designs, ensuring every stitch is precise and every piece achieves professional excellence.
Difference Between JPG and DST File
For compressing digital photographs, the JPEG (Joint Photographic Experts Group) format is a popular choice. JPEG files are well-known for finding a balance between file size and picture quality. They work well with nearly all devices and are perfect for photos with detailed colour gradients. They are widely used for online picture sharing and storing due to their efficiency and flexibility.
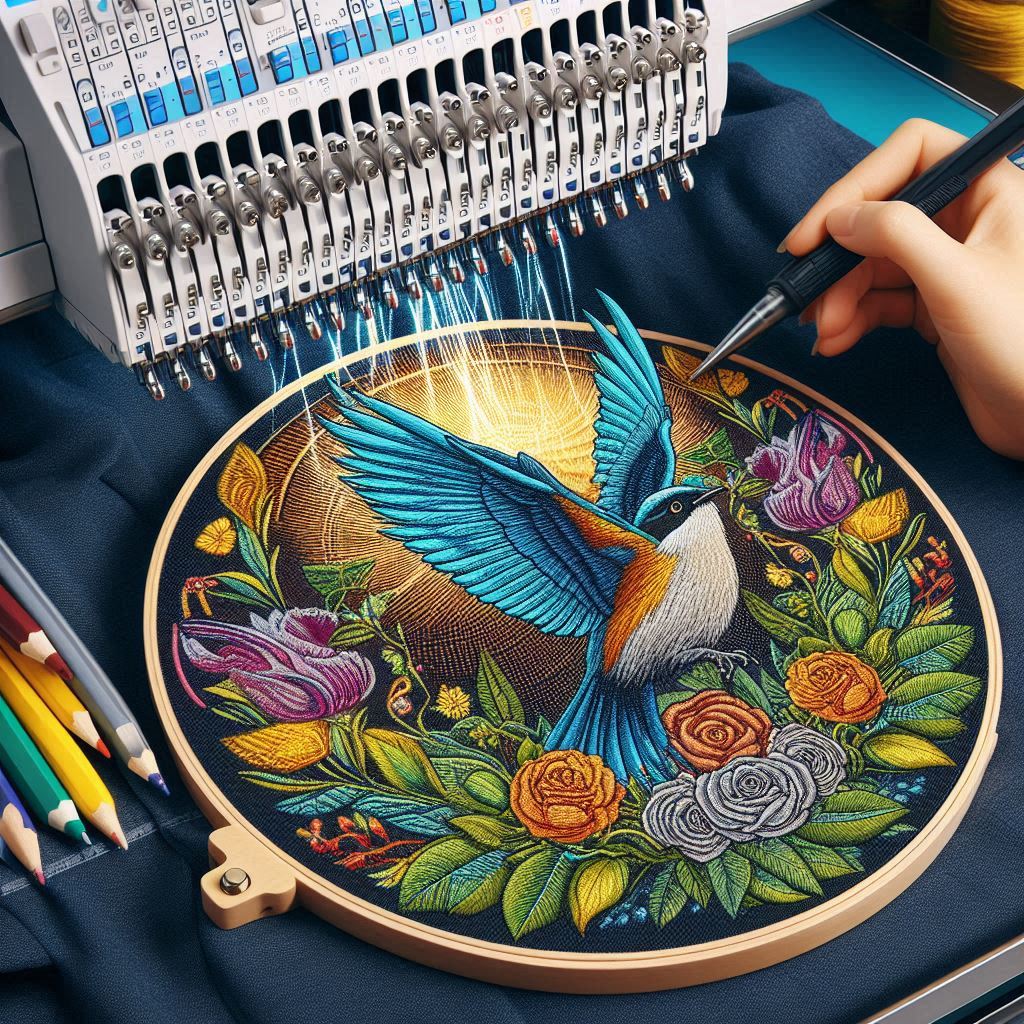
On the other hand, the DST format is used in embroidery because it gives machines exact instructions on how to make stitches that make your patterns come to life. Proper digitizing guarantees expert outcomes on a range of clothing items, from complex logos to detailed artwork.
Why Are DST Files Essential for EMBROIDERY MACHINES?
The DST files form the basis of the embroidery machine, forming the pattern for stitching out your design in a specified manner ensuring accuracy and quality. This is the reason why DST files are so important:
-
STITCH PATTERNS:
DST files can contain satin stitches for the lines, fill stitches for the areas, as well as run stitches for details. -
DENSITY CONTROL:
They make certain that the stitches are cross-stitched well with any piece of material that is being used. No more wrinkles, no more stretching – just bright embroidery. -
THREAD COLOURS:
These files assist the machine in determining where to put the color, thus giving a professional finish to your logo or artwork.
Embroidery machines cannot put your design into stitches properly if there is no DST file. Whether it is bulk apparels or a single hat, this file is necessary.
WHAT SHOULD YOU KNOW BEFORE CONVERTING A JPG TO A DST FILE?
SPECIALISED SOFTWARE
In order to change a JPG image into DST format, first install software specially designed for embroidery. You won’t be able to create DST format files using normal graphics design tools such as Photoshop or Canva. Some programs which are commonly used for this purpose which comprise of;
-
SewArt
-
Ink/STITCH
-
Wilcom
-
Brother PE-Design and Embrilliance
These tools are primarily meant for EMBROIDERY digitizing so they provide features like STITCH types settings, density settings, and others.
UNDERSTANDING THE BASICS
To convert jpg to dst file, it is necessary to have some knowledge of Embroidery Digitizing. You have to know about stitches, underlays and densities on various fabrics. If you are dealing with bulk apparel or decorations on the left chest area, then accuracy becomes more important.
BEST WAY TO CONVERT A JPG TO A DST FILE
It is advised to utilize a specialized service for the best outcome. Although it is easy to learn and use the software on your own, making effective DST files necessitates expertise and effort. Making use of experts makes sure that your artwork is perfectly transformed without incorrect placements of stitches or bad density.
In case you're managing a B2B project or most likely require divided apparel digitizing, contacting the experts at Champion Digitizing will not only save you time but also improve the results. Even in the case of complex designs such as hat logo, left chest, as well as large apparel designs make no difference to a professional.
STEP-BY-STEP PROCESS TO CONVERT JPG TO DST
Step 1: Prepare Your Design
Before starting the digitizing process in Wilcom Embroidery Software, you need to prepare your JPG file to ensure it can be effectively converted into a DST format. Properly preparing your image facilitates a smoother digitizing experience and results in an embroidered design that stitches accurately on your fabric.
-
Polish the design: Before going for embroidery it would be necessary to clean up your design in graphic editing software such as Adobe Photoshop or GIMP. Getting rid of unnecessary details like fine lines, excessive gradients, or unwanted background is important since they won’t translate well in stitches. The remaining elements of the design should be a few that will be clearly seen after being embroidered while still being easy enough to keep the design simple.
-
Adjust Resolutions: Next, adjust the image or the JPG file resolution. Always keep in mind that images must not be of a quality lower than 300. This is to ensure that clarity and detail are maintained once the image is brought into Wilcom for redesigning purposes. Usually, poor quality images result in the picture having sharp corners and blurred details which makes it very difficult for tracing or even for dipping.
-
Simplify the Elements: Although stitches electronically stitched together are transformed smoothly into embroidery, the same is not true for small features and detailed geometry. Gradient ideals do not usually lead to correct stitching which ends up being messier. Instead, change them first to solid colors and shapes. Change the text for the beginner to a font that is suitable so that it can be read correctly even after the process of embroidery is done.
-
Resize the image if needed: It is possible to resize jpeg with the corner handles but to adjust properly make sure to hold down the Shift tilt so as to retain the aspect ratio when resizing.
Step 2: Import the JPG into Digitizing Software
Once your JPG is ready, launch Wilcom Embroidery Software and start a new project. You can now import your prepared JPG by selecting Insert Image or Import Artwork option, Position and scale down the design to the size of your embroidery field, e.g a logo on the left chest or a hat.
Use alignment tools to ensure the design is adjusted to the size of the hoop and is also center placed, in order to prepare it for digitization as a DST file.
Step 3: Turn Your Image into an Embroidery Design
After importing your image, the next step is to turn it into an embroidery pattern. Here’s how:
-
Trace the Image: You can trace the image manually or use an auto-trace feature if your software has one. This changes the image into stitch lines.
-
Choose Stitch Types: Pick different stitch types for different parts of the image. For example, use a satin stitch for edges and a fill stitch for larger areas.
-
Adjust Stitch Settings: Change settings like stitch density, angle, and length to make sure the design works well with the fabric you’ll be stitching on.
Setting Stitch Types (Satin, Fill, Run Stitch)
First, TBEP (Tie Back and End Point) would like you to recommend the type of stitches best suitable for the components of your design.
- Satin Stitch: It is the best example to use for some outlines, borders and text when finer areas are made requiring a smooth polished finishing.
- Fill Stitch: Ideal for greater surface areas and larger components of the design. It ensures a pleasing degree of coverage and toughness.
- Run Stitch: It works best for details like borders or to join different designs or pieces together using less thread on the piece and working great on thinner lines.
Adjusting Stitch Density and Underlay
Any Stitch Density control applied directly affects how balanced the design would turn out to be.
Stitch Density:
Increasing or decreasing density helps and adjusts the fabric and the design’s complexity around it. Too much density can lead to stuffing and creating wrinkles whilst too little may appear to be too thin.
Underlay Stitches:
Add a layer of embroidery stitches that are ordinarily attached as an undercoat which works to help stabilize the stitch and enhance its resilience. Consider edge runs, zigzags, or fills at the seam line depending on the requirements of the design.
-
Champion Digitizing ensures professional sealing on the dst file to enable a successful stitching out without any problems using the embroidery sewing machine.
Step 4: Save it In dst Format
As soon as the digitizing process is done in the Wilcom Embroidery Software, the last thing that needs to be done is check, edit, and save the file in the DST format which can be used with the embroidery machine.
-
Pretend the Stitching: The stitch simulation feature present in the software lets you see how the design will embroider. Watch for problems like overlapping stitches and gaps, or too much density and make the necessary changes. This helps in spotting any issues that could arise during the production stage.
-
Double-Check Design Settings: It is critical to check stitches, density and underlay for the material that you are going to use for your apparel, left chest logo or a hat design. Check the color of threads assigned and make sure that the design follows the size of the hoop as well.
-
Export as DST File: Starting from the Wilcom application, go to the Export or Save As option and from the list of embroidery file formats select DST. Appropriately name the file for clarity and provide the suitable directory that the folder can be easily located to.
-
Transfer the File to Your Embroidery Machine: Using the appropriate method of connection, load the DST file into the flash disk or send it directly to your embroidery machine for B2B or bulk orders. The file is ready for use and your logo or design is perfect for stitching.
Upon implementing these steps, you will have a DST file which has been fully completed and is ready for perfect performance on your embroidery machine.
Manual Versus Auto-Digitizing/Tracing: Advantages And Disadvantages
Manual Tracing:
Advantage: Every stitch is placed at an ideal location by the operator which is a perfect option for detailed designs or small texts.
Disadvantage:It is very time consuming and intensive work having to be skilled in various stitching methods
Auto-Digitizing:
Advantage: The time and effort spent on basic designs is minimal making the task of auto tracing for simple artwork insightful.
Disadvantage: When it comes to functions for detailed rendering work, its accuracy is acceptable. However, it lags behind in some simpler patterns.
FAQs About Converting JPG to DST
Can you create a DST file using any program?
No, a DST file can only be created with specific embroidery software.
What is the price for converting a JPG to DST?
Prices vary based on the complexity and the total stitch count of the artwork.
Are you capable of completing bulk orders of APPAREL designs?
Yes, professional digitizing services are primarily focused on B2B and bulk Apparel projects.
CONCLUSION
Turning an image such as a JPG into a DST embroidery file starts the process of creating a beautiful design suitable for the machine. So, whether you are working on a left chest, a design for hat or any sort of bulk apparel order, having the right DST file at hand will guarantee that the results obtained are satisfactory. It’s a good idea to outsource the service to experts. Champion Digitizing is here just for that.
Utilize our professional services to quickly and easily convert JPG to DST files with attention to detail. No matter if it's a personal or a professional task, make embroidery digitizing easier with Champion Digitizing.